Thursday, August 25, 2011

Death of 1st Panzer #1&2, Blind Sided & Speed Bumps, May 1985


We played the first two scenarios of World at War: Death of 1st Panzer tonight.

BLIND SIDED: Me (USSR) vs. Aaron (Germany). He managed to get his Jaguar up onto the hill in the backfield as I crested the large hill on the other side of the valley. So I charged my tanks into the shadow of Talen and assaulted it. I lost several stacks of T-72's before taking the town, and realized that there was no way for me to reach Walkerburg through his enfilading fire. I fled with two platoons of tanks, conceding the game to Aaron.

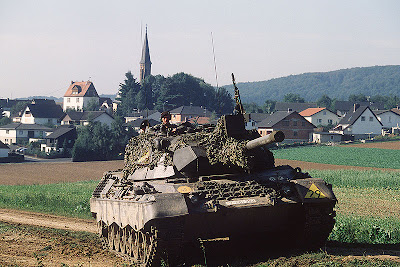
SPEED BUMPS: Second up was Kurt (USSR), vs. Aaron's germans. Kurt split his assault on both sides of the east-west river. Aaron dropped mines north of the river and set up a crossfire from Wittburg, Talen and his Leopard II, lurking behind Talen. That fire finished off the BMP-1's. Kurt's half-hearted attempt to rush Wittburg from the reverse of the big hill petered out as well.

GRADE: Both games are good teaching situations, but very difficult for the Soviet player to win without lucky chit-pulls. On the other hand, both were also great examples of what to avoid as the Soviets: exposure in the open, and dispersal of focus. The soviets, on the attack, have to mass overwhelming numbers in a safe spot, and wait for the right moment to perform a wave assault on a portion of the defender's force. I tried to change direction mid-game and instead found myself in a cul-de-sac with fire coming down on me from all sides anytime I tried to move. Kurt divided his forces and watched each of them get picked apart as he approached the german positions. Aaron had teams of Marders and Milan-equipped infantry in advanced positions (in towns) and in both games, they managed to use multiple activations to rip the heart out of the soviet formations.


Monday, August 22, 2011

Eisenbach Gap #4: Maelstrom, May 1985

Solo play of this big scenario

SITUATION: The US is defending the northern edge of the map from a wide soviet assault. To do it, the US gets Alpha and Charlie teams, and Charlie's limited to two Infantry Platoons, an M113 and some Dragon ATGM's. Team Delta will arrive on turn 4 from the north with 3 platoons of M-1's. The soviets get the vaunted 1st Tank, 33rd Motorized Rifle and the 87th Motorized Rifle (both somewhat understrength), and a pair of Hind attack helicopters. Their goal is to exit 6 full units off the north map edge by turn 11. The western edge of the map has the most covered approaches for the USSR. The center is open with commanding hilltops allowing good crossfires for the defender. The east has some cover as you move north, but a wide river cuts off access to the northern map edge except at two bridges.

STRATEGY: US set up with Alpha in the West, contesting the covered approach. A pair of Bradleys and the Chaparal attached (also Alpha), set up on the central hilltop. Charlie guarded the bridges in the east.

1st Tank and 33rd MR attacked in the west, moving into attack positions south of the hill where Alpha waited. 1st tank took a beating from Alpha as it advanced, but managed to knock out both Bradleys and forced the M-1's to fall back to the rear of the hilltop. When Delta arrived, they, with the remaining Alpha platoons, methodically picked apart 1st Tank until it was no longer a threat. Mid-game, Delta drove to the center of the board to support Charlie and two platoons of 1st Tank managed to get off the board with their HQ.

87th MR fought their way over one of the bridges with the help of the Helicopters, but their drive stalled out as Delta arrived, along with Alpha's helicopter and the two soviet helicopters left play.

33rd MR made a dash for the board edge, but were also destroyed by Delta's Abrams platoons, which suffered no losses.

RATING: Balanced. A very good scenario with a lot of interesting terrain and a good force mix. I used the Soviet helos badly.