Wednesday, September 14, 2011

Death of 1st Panzer #3, Wittman's Ghost

Eric was the Germans, I was the Soviets. Victory depends on the Soviet player controlling both hexes of Wittburg at the end of turn 8.

OPENING: I deployed in Wittburg with my Soviet Paras, hoping to fend off Eric's Panzergrenadiers and Leopard II's long enough for 1st Tank to arrive from the East. He charged his Marders up onto Wittburg Hill while pounding Talen with HE fire from his Leopards. I cut down an infantry platoon that he'd pushed across open ground, but little else.

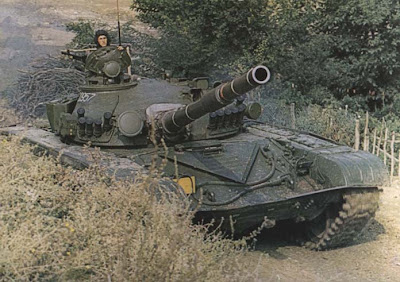
1st Tank arrived on turn 2, but was hit hard as it broke out of Eben. Three T-72 platoons were disrupted, then burnt up, from Leopard fire at extended range. He caught several more before they were able to get safely behind Wittburg Hill, then blew up a few more with Milans from his Marders as I reached the hilltop. 1st Tank had taken around 50% casualties by this point without firing a shot.

MIDGAME: The T-72's got their revenge, as they overran his infantry and assaulted (and destroyed) his Marders. With the infantry routed, 1st Tank swept down off the hill to take up a defensive position screening Wittburg. They were protected from his Leopards in Talen, but would be able to hit them with opportunity fire if they advanced. The Germans seemed to have no intention of advancing, however, as they cheerfully reduced downtown Wittburg to rubble with High Explosive fire.

ENDGAME: The Germans destroyed everything in Wittburg, and threatened the more of the same to any survivors who ventured back into it. On the final turn of the game, however, I raced my final three platoons from 1st Tank back into town (two of them exploded en route, under his overwatching tanks). When the third "end-turn" chit was pulled, ending the game,I could boast a disrupted BDRM-2 on the hilltop part of town, and a reduced T-72 platoon with 1st Tank's HQ in the lower part of town. Glorious Victory!

RATING: B+ to A. An interesting mix of units. Fast and bloody. The Soviets have a mortar and an odd little AT gun to complement their high-morale paratroopers. 1st Tank, though down to 8 platoons and a BDRM, is a force to be respected. The German Leopards, once again, completely dominate everything else on the board. They are ferocious opponents, rolling 4 dice out to 18 hexes, hitting on 4's. With an HQ, they roll 6 dice. A T-72 saves by rolling 4 dice, looking for 6's. No contest. At 9 hexes, it's even worse, and at 4 hexes, they hit on anything but a 1. That said, there are only 3 Leopards, and 1st Tank gets a designated formation marker, allowing it to activate as many times as the Germans do. In the end, it was a close game, coming down to a final chit-pull (just like the last game with Aaron!).


Test of Fire: July 21, 1861

Played at Uptown with General Kurticus commanding the South and yours truly commanding the North. We used an enlarged map with Battlecry pieces. Very nice looking game. Not a big fan of the pieces that come with the published game, but they're generic so you can substitute almost anything for them. The map and cards are very nice.

PLAY: I plunked a ford down on the Stone Bridge and spent the rest of the game slamming my head into the stone wall of Henry House Hill. In retrospect, it would have been better to have put the ford on one of the river sections beside the bridge, allowing me to get in around him to cut off the hill and allow my boys to cross the bridge in peace. As it was, I was only able to wrap around him very late in the game, and ran out of time.

DESIGN: The defense is very strong, as is appropriate for a Civil War game. I think it's important, as the attacker, to sequence your movements and attacks to stop simple retreats and convert them into kills, otherwise, frontal assaults are more or less useless if your opponant has 3+ men defending. I'm looking forward to playing again, to try to crack the code.

Thursday, September 8, 2011

The Untold Stories #2: Sideshow, May 29, 1985

Aaron was the Dutch, I was the Soviets. We played on Map B instead of Map A which made for some interesting choices. I set my Marines and improved positions in Witzhave, south of the east/west river. Aaron attacked across the fields north of Grande, driving half-way in, then coming the rest of the way on foot. My Sagger unit got disrupted by artillery and stayed that way, allowing his forces to close in on the east side of town. He managed to force his way into the improved positions with waves of infantry assaults, until I was left holding the bridge with one dug-in, disrupted Marine platoon. By mid-game the T-80's of the Kiev Guard were arriving from the north and, despite the mild pecking they took from a Dutch F-16, took up position in the northern suburbs. Aaron's Prins Bernhard Stoottroepen stormed over the bridge, suffering heavy fire from lines of T-80's, but managed to get into hand to hand combat with them. In the towns, the lack of infantry told on the Soviet units. All T-80's were forced into the fields north of town and were unable to fight their way back in. At the last moment, Hero of the Soviet Union Sergei Platov launched a desperate charge along the southern bank of the river, breaking into the town just east of the bridge. The Dutch recoiled, and the Soviets began to dig in again.

Great scenario. Really tense, and victory came down to a chit-pull. There were four chits in the cup, one of them would end the game, the others would give Aaron a chance to chuck me out of town and win. The game-end chit was pulled! We pulled again to see what would have happened, and he did push me out, which gives you a sense of how close the scenario was. Infantry vs. unsupported armor is super tough. Awesome.

Thursday, September 1, 2011

Death of 1st Panzer #2: Speed Bumps, May 15th, 1985

Solitaired this scenario twice more, trying to settle on a winning Soviet gambit. The Leopard II with HQ is an instant-kill every time it fires, and the rest of the german force can expect four disruption/reductions per activation (against BMP's).

SOVIET STRATEGY: The best I've come up with is to have the infantry enter the map on foot, and march towards Wittburg, accompanied by the HQ and one or more T-62's. That protects them from Milan fire from Talen (the HQ will draw fire, but hopefully it will survive or just be reduced). Second, have the full BMP force enter separately, moving out into the wedge-shaped piece of open country East of Talen. One or two will die, but the rest can sit patiently, threatening all moving german vehicles with a barrage of Saggers.

MID GAME: both Marder platoons will be destroyed, a handful of BMP's wrecked or disrupted, and a bunch of soviet infantry on the hilltop, ready to assault Wittburg. The BMP's will be out of command for most of the game, but they're mainly providing opportunity fire. Over time, a few of them will make their command rolls, so the soviets will have some direct fire.

END GAME: will feature the Leopard II sitting in Talen, plus a german infantry unit in the fields nearby, peppering helpless BMP's with Milans twice a turn. The Soviets will have most of their surviving units disrupted or reduced or both. The BMP force will be only partially in command, and odds are that that part will be unable to rally. Using those unreliable assets, the USSR has to march its infantry into the teeth of the German death-trap, more or less unsupported by what BMP fire there is (the forest to the East of Talen blocking their LOS). The game will end with the Germans holding Talen and the Soviets holding Wittburg.

VARIANT: I've played around with one variant so far: Give the Soviets one BDRM (another option for calling in artillery fire), and one Sagger (allowing soviet infantry to threaten the Leopard in the end-game). In my game, the BDRM drew immediate fire when it poked its head out, but assuming it survives, it can sit quietly, remaining in command, calling in artillery fire. In my game, this was a very minor advantage. The Leopard II shrugged off the infantry's Sagger fire (Sagger is 3 dice hitting on 4's vs. the Leopard in town at 5-6 dice saving on 5's).

RATING: Soviets will lose without some sort of force enhancement. Another idea is to add the 87th Motor Rifle, and get rid of the (admittedly cool) radio jamming SSR.